If there is a leak in the head gasket, it can turn a minor engine issue into a costly repair if it goes undiagnosed at the beginning. The signs of a leaking head gasket include loss of coolant, white smoke from the exhaust, rising temperature of the engine, and oily liquid appearing as a milky substance.
Knowing the signs of a leaking head gasket can help prevent engine damage and guide repair decisions.
In this blog, you’ll learn the common leaking head gasket symptoms, what causes gasket failure, how to identify different types of leaks, and what repair options are available.

The head gasket is placed between the engine block and the cylinder head. It seals the combustion chambers while also allowing engine oil and coolant passages to remain separate.
This component is designed to endure an environment with extremely high temperatures, high combustion pressure, and fluctuations in temperature. However, failure can cause loss of coolant, contamination of the oil, overheating, engine misfires, and a loss of power.

The distinct symptoms are determined based on the location of failure. No single symptom is sufficient to establish the fact. So it is necessary to consider the overall pattern and perform required tests.
White Smoke Emitting from the Exhaust:
Continuous white smoke after warm-up indicates that coolant is entering the cylinder head. The condensation during a cold start is common. Therefore, check if the smoke is still there after the engine has warmed up.
Unexpected Coolant Loss:
A decrease in coolant levels without any obvious external leak might indicate an internal leak. However, it is also necessary to check the cooling system.
Engine Overheating:
The broken gasket can allow combustion gases to get into the cooling system. A malfunctioning thermostat, radiator, water pump, and fan can also cause overheating.
Milky or Frothy Engine Oil:
When the coolant gets into engine oil, it can result in the formation of thick deposits on the dipstick or under the filler cap. In addition, condensation can look similar, but contamination of the oil or an increased amount is also a reason to switch off the engine and ensure that it has been examined.
Constant Bubbles in the Coolant:
Constant bubbles in the reservoir could be a sign of combustion gas. It is safe to have the bubbles checked by a mechanic. Never open a hot radiator or pressurized tank because hot coolant can burn you seriously.
Rough Idling or Engine Misfire:
Coolant entering a cylinder or low compression can cause problems such as rough running, misfiring, or starting difficulties. However, faults with the ignition and fuel systems can also have similar symptoms.
Leaking Oil or Coolant from the Engine:
Sometimes a gasket can fail and let fluid escape. In case you suspect that your head gasket is leaking oil or coolant, keep in mind that oil could also be coming from adjacent oil seals. The leak’s location and diagnostic results matter.

Common causes are:
Eliminate the original cause, or the replacement gasket will fail again.
Oil and coolants may leak from various locations:
A head gasket may lead to fluid intermixing, loss of compression pressure, combustion gas in the cooling circuit, and an external source of fluid leak at the head-to-block interface. Pressure, compression, leak-down, or combustion-gas tests help identify it as a source of cylinder head leakage.
Absolutely. A tiny head gasket leak may start to cause coolant loss or create misfires before the temperature gauge hits the red. Normal temperatures do not mean that your head gasket is fine. Arrange an inspection for recurring symptoms.
Driving with a suspected failure could result in extensive engine damage.
If you notice that your engine is overheating, oil seems to be dirty, coolant loss is rapid, or you are experiencing severe misfire or loss of power, you should pull over immediately and switch off the engine. This also applies to steam or continuous white smoke that you may see while losing coolant very fast.
Do not remove a hot radiator cap or continue driving to check if symptoms disappear. Enough coolant in a cylinder can prevent it from turning, while dirty oil can affect bearings. If there was a chance of more serious damage happening, refrain from engine use and arrange towing. Recurring coolant loss needs prompt diagnosis even if temperature seems normal.
Based on the symptoms of the vehicle, a mechanic may choose to conduct the following checks:
However, it should not be presumed that an engine will require all of these tests. The decision will depend on the preliminary diagnosis.
In case of confirmed failure, it is usually necessary to change the gasket and check the sealing surfaces.
Certain repairs might also imply the dismantling of the timing system as well as changing of fluids and seals or machine- shop work.
Head bolts are cylindrical fasteners that hold the cylinder head to the block. Loose, stripped, or cross-threaded head bolts, or improper torque or tightening sequence of the bolts, can lead to a faulty head gasket.
On some engines, the head bolts are torque-to-yield and must be replaced each time they are removed. On others, it may be possible to reuse them, provided the manufacturer recommends it. Always ensure that you are using the correct fasteners and procedure for your engine.
If you are a first-time DIY mechanic, this is a job that you may not want to try on your own. It is time-consuming, involves many hardware parts, and requires special tools, in addition to the knowledge of how to use them correctly.
The repair often takes 10 to 20 hours or more, depending on how complex your engine is and whether other components need to be removed to gain access to the cylinder head. Before attempting the job, read the owner’s manual and familiarize yourself with the instructions in the repair manual.
In the United States, the cost of replacement can range from $1,500 to $4,000 or higher, depending on the model of the car, labor rates, and repair requirements. This is a broad estimate.
Labor can be expensive, as the cylinder head may require extensive access to the fasteners, fluids, resurfacing, and testing, as well as cooling system repairs. An itemized estimate should be requested.
Such products can partially resolve the issue, but there are several exceptions. A sealer is powerless against a warped head, major head gasket failure, and a crack. It is crucial to study the instructions carefully and consult an expert in case of persistent problems with the engine, such as engine overheating, a mixture of oil and coolant, and loss of performance.
Maintenance cannot ensure prevention, but it can minimize unnecessary engine stress:
For a reliable repair, you will require more than just a new gasket. It is also important to have the compatible parts, correct fasteners, clean surfaces, and follow the manufacturer’s instructions in order to install the parts correctly.
It is crucial to check application, dimensions, material, and installation requirements, and follow the vehicle manufacturer’s specifications.
The right diagnosis and the repair should be done in a timely manner to avoid further engine damage and expense.
Looking for dependable diesel engine hardware and fastener solutions? Visit TrachTech Fasteners to explore available products and find parts suited to your engine type. Select the right hardware, follow the correct installation procedures, and give your engine the attention it needs for reliable performance.

A small fastener can affect the fluid system of any engine. A banjo bolt is an example of a specialised hollow fastener. The purpose of a banjo bolt is to keep the fitting in place but, at the same time, permit the liquid to move through internal channels. The compact design of this fastener makes it useful in diesel fuel systems, motorcycle braking systems, turbocharger oil lines, as well as in other applications where space and location of the liquid path is especially important.
Choosing the wrong bolt may lead to fitment issues or system leaks. The choice must be made based on size, length, internal passage dimensions, use of washers, and equipment compatibility.
Whether you are replacing a leaking connection or upgrading your diesel fuel system, the right banjo bolt specification knowledge will help you select the right hardware for the job.

A banjo bolt is generally a hollow bolt with threads on one or both ends that secure a ring-shaped fluid connection fitting and allow fluid to pass through. Unlike a conventional bolt, it performs two functions: fastening the connection and helping the fluid to travel through it.
It usually consists of three primary parts:
The name “banjo bolt” comes from the ring-shaped design of the fitting, similar to the musical instrument called a banjo. The banjo connection allows a hose to be connected at a suitable angle without rotating the whole hose during the installation.
The bolt includes a central bore and cross-drilled holes that lead from the internal passage to the sides of the fitting. Fluid travels between the attached line and the receiving part through the holes.
The ring fitting goes around the bolt. The washers are placed on the surfaces indicated, and tightening the fitting compresses them to create a fluid-tight connection.
The engaging threads provide the clamping force. The washers and the adjacent surfaces contain the fluid. Correct thread engagement alone is not enough for a good seal.
Banjo fittings are used in the fuel supply, return, or injector connections of certain diesel engines. TrackTech Fasteners lists high-flow fuel banjo bolting in the 1994-2003 7.3L Ford Powerstroke engine and the injector return banjo bolt products for the 2001-2004 6.6L Duramax LB7 engine. These listings show the importance of engine-specific fitment.
A brake banjo bolt is used to connect a flexible brake line to a matching caliper or master cylinder. Some hydraulic clutch systems also have similar connections.
A brake line assembly with a banjo bolt must make sure to withstand hydraulic pressure. In the assembly process, the bolt, fitting, washers, and receiving port must match the vehicle manufacturer’s specifications.
Some turbocharger systems utilize banjo-style connections for the supply of lubricating oil. The internal passage must be compatible with the specified oil-flow requirements of the engine.
Agricultural machinery, construction equipment, and industrial applications may use banjo connections in systems where compact fluid routing is beneficial. Pressure ratings, service temperatures, and fluid compatibility will dictate the choice of assembly.
A standard banjo bolt consists of a hollow shaft, a threaded section, and cross-drilled holes. Usually, it is designed to accommodate a single compatible fitting.
As the name suggests, a double banjo bolt is used to accommodate two compatible fittings at one connection point. It requires a specific receiving port designed for the combined assembly, as well as an appropriate bolt length with a specific seal.
High-flow banjo bolts are characterized by modified flow passages or openings designed to improve flow compared with a particular original design.
TrackTech lists high-flow fuel banjo bolts for select 7.3L Powerstroke engines. However, the actual result will depend on the overall fuel system and its application.
Banjo Bolt sizes differ by manufacturer and equipment. The chart below shows examples for identification when ordering, not as replacement recommendations for all applications.
| Application | Example thread sizes | Sealing arrangement |
|---|---|---|
| Motorcycle and automotive brakes | M10 × 1.0 or M10 × 1.25 on some models | Specified copper or aluminum washers |
| Turbocharger oil connections | M10 or M12 on some designs | Application-specific metal or bonded seals |
| Diesel fuel supply and return | Engine-specific metric or other thread standards | Specified washers or seals |
| Double banjo assemblies | Determined by the receiving port | Washers for each specified sealing interface |
Note: The examples shown are not fitments for any particular application. See original part number, thread pitch, length of bolt, fitting size, washer specifications, and equipment manufacturer’s technical publications for correct replacement part.
Banjo bolt washers create a seal between the two interfaces around the fitting. With the wrong type of seal, fluid can run out of the fitting despite a correctly sized bolt. If you are using the wrong washer for the job, it can allow fluid to escape when the banjo bolt is used in a threaded port.
You must ensure the inner diameter and outer diameter of the washer, the washer’s thickness, its material, and its compatibility with the mating surfaces. Even if the washer fits on the end of the bolt, the bolt may still be unsuitable for the connection.
Washers may be designed for single use only. Follow the manufacturer’s recommendations for replacement washers, especially for brake and fuel systems.
There are quite a few reasons for a leaking banjo bolt:
Take a closer look at the entire connection and not just the bolt, assuming it is defective. If there is a leak of oil or brake fluid, do not allow the machinery to be used until the issue has been fixed.
Make sure to follow the practices for maintaining proper assembly:
It should be noted that there is no common torque value for all banjo bolts. The correct specification depends on the fastener, sealing arrangement, and receiving parts.
Do not identify a thread’s type based only on how it looks. Thus, metric threads specify the diameter and pitch in millimeters, while unified threads measure the diameter in inches and threads per inch as well. UNF stands for Unified National Fine.
To identify what bolt is already available:
Make sure to check the necessary lengths, thread engagement, fitting size, and bore dimensions. A long bolt can hit the bottom, and the wrong internal passage can disrupt system flow.
TrackTech Fasteners distinguishes different applications of Powerstroke and Duramax in their products. Verify engine family, model year, as well as the product description and included hardware before ordering replacement.
Choosing the appropriate banjo bolt starts with matching the component to your engine and fuel-system requirements.TrackTech Fasteners carries a variety of high-flow fuel banjo bolts for select 7.3L Ford Powerstroke applications, as well as injector return banjo bolt products for the 2001-2004 6.6L Duramax LB7.
Learn more about TrackTech Fasteners’ fuel system products and parts so that you know what hardware is in stock and what applications it fits.
No matter what you are looking for, whether you are replacing old equipment or browsing for compatible spares, always research the products you are considering. The right component should match the intended application—not merely look similar to the original.

The Ford 6.0L Power Stroke diesel engine is built to perform some of the hardest-hitting jobs, such as typical driving and heavy towing. This makes the blue spring kit 6.0 Powerstroke upgrade an important consideration for some truck owners’ maintenance practices, as it helps the injectors function properly by ensuring sufficient fuel pressure.
The blue spring modifies the fuel pressure regulator system. It allows for more effective fuel pressure maintenance than previous designs. This is important because this upgrade is not a universal remedy, and installing the spring alone may be insufficient in some cases.
Thus, in order to be sure of making the right decision in your situation, you need to have a proper understanding of the principles of operation of the blue spring. You should know the parts of your engine that need replacement and check what you have in mind before making a purchasing decision.
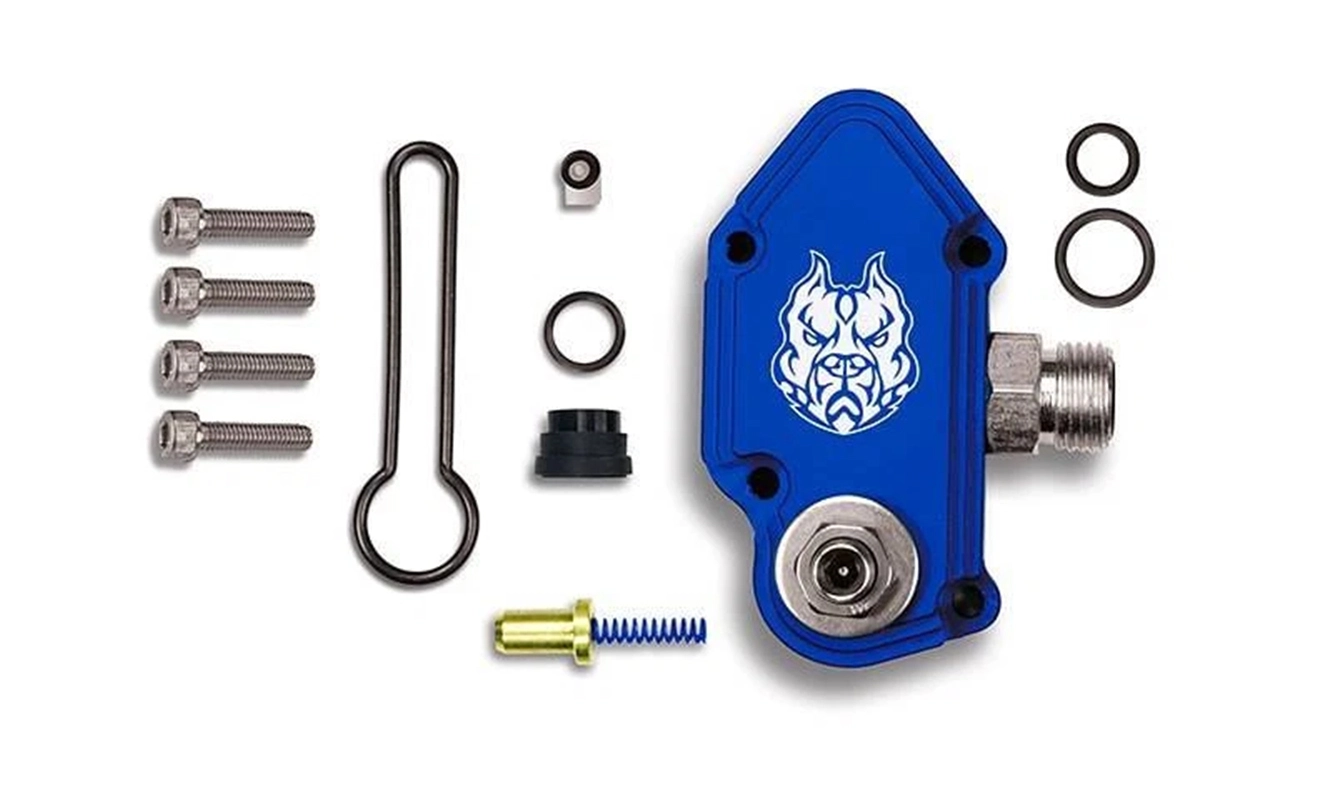
The blue spring kit can be defined as the fuel pressure regulator repair kit compatible with Ford 6.0L Power Stroke diesel engines. The major part of this kit is the updated spring that alters the pressure adjustment characteristics.
The fuel pressure regulator controls the return of the excess fuel through the system, ensuring the correct level of pressure for the motor’s injectors. The updated spring is stronger than the first production model.
The blue spring kit for 6.0 can contain the spring, the regulator plunger, the seals, O-rings, the gasket, and the installation apparatus. Kit components vary, so it is necessary to verify what a kit includes before purchasing.
A 6.0L Power Stroke employs electronically controlled, hydraulically actuated unit injectors that depend on proper fuel supply to run, making fuel pressure maintenance an essential engine service aspect.
Fuel return is controlled by a regulator that consists of a spring-loaded plunger that controls fuel return. When pressure levels reach the regulator’s opening threshold, the plunger permits excess fuel to return to the tank.
The new spring alters this threshold so that a higher fuel pressure can be maintained. In the case of an older engine with the original spring, the change can solve inadequate pressure. But it cannot cure unrelated problems like a failing fuel pump or restricted filters.
Low fuel pressure can lead to injector wear and improper engine function. The recommended minimum fuel pressure reading for the 6.0L Power Stroke is 45 psi at the specified test parameters.
It is common to see pressure readings of 55-65psi with the new springs installed. However, vehicle condition and operational parameters can affect the final results. Be sure to consult the proper specifications and testing procedure for your vehicle.
A blue spring update is able to fix up fuel system reliability rather than delivering guaranteed horsepower gains.
Contributes to Correct Fuel Pressure Maintenance: The newly introduced springs will help deal with fuel pressure loss that occurs when the factory regulator springs do not operate properly. Keeping the right pressure will ensure continuous fuel delivery in normal driving conditions, towing tasks, and any other challenging situation.
Promotes Dependability of Injectors:
Injectors need a sufficient fuel supply. Fixing low pressure will reduce wear in the injectors caused by lack of fuel delivery. But the upgrade can’t prevent all types of injector failures.
May Enhance Drivability:
If low fuel pressure causes rough running, hesitation, and poor power, fixing the underlying problem will lead to better engine performance. The results will vary, and these symptoms can have varying causes.
Delivers Targeted Maintenance Update:
In case of a compatible engine with the original spring in place, the 6.0 blue spring upgrade will make maintenance changes in a way that does not require a broader engine performance modification.
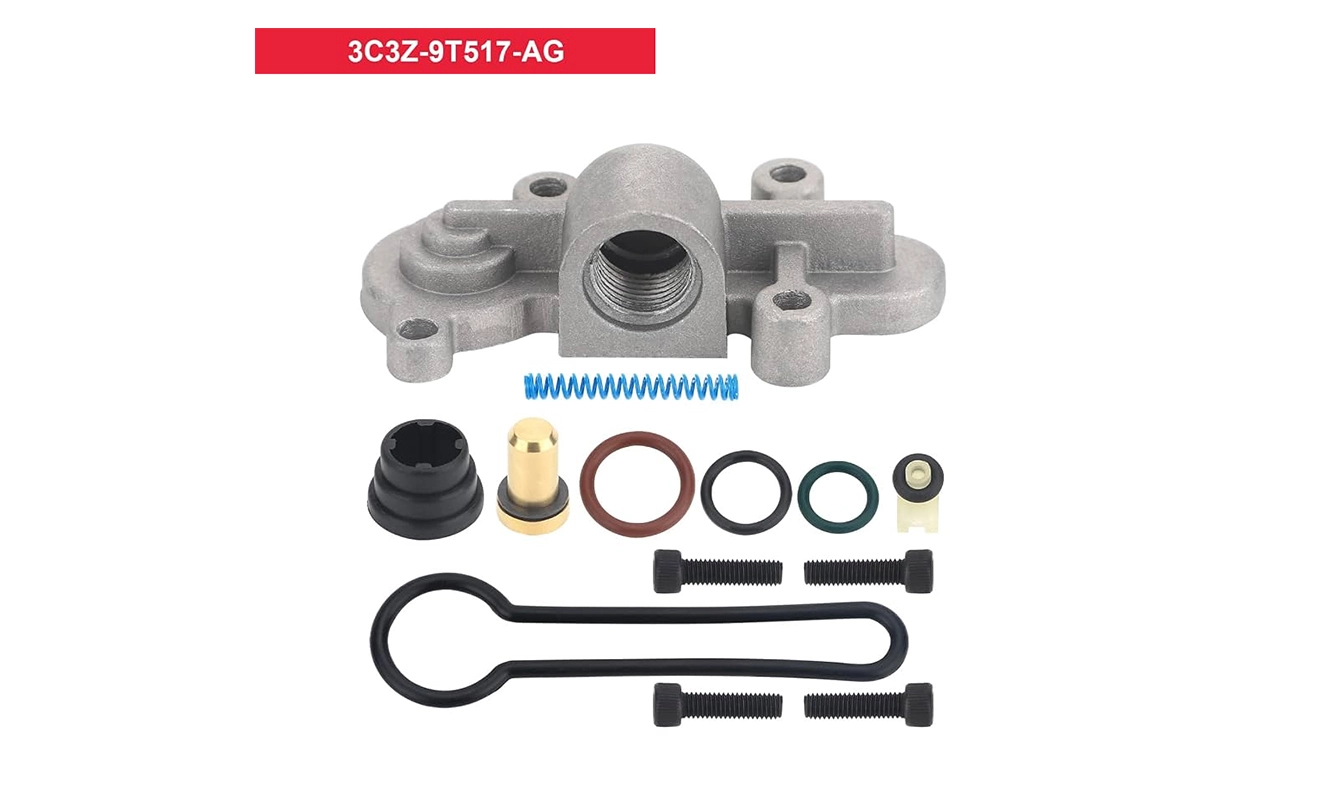
Selecting the most appropriate kit needs more than checking whether a listing mentions the 6.0L Power Stroke. Various regulator assemblies may need different service parts.
The aforementioned part number tends to be related to a more comprehensive regulator service kit that contains the upgraded spring, plunger, seals, and other accessories. Double-check the latest parts and fitment information for your application before ordering.
The mentioned part number tends to relate to another regulator service kit that was popular for the specific later F-Series applications. The contents of this kit are different, and some components required by earlier configurations may not be included.
The E-Series vans may also require various service components. Make sure to check your engine, model year, regulator design, and current manufacturer guidelines for compatibility.
Not necessarily. Ford has implemented the new springs during the production process, and some of the models may already come equipped with the modifications.
Check maintenance records about your vehicle’s repairs and existing components if possible. In case your vehicle’s fuel pressure is lower than it should be, try to diagnose the problem before purchasing a replacement kit.
The correct choice depends on the specific regulator condition as well as what components are included in each package.
| Feature | Spring-only kit | Complete service kit |
|---|---|---|
| Updated spring | Included | Included |
| Cover gasket | Often included | Usually included |
| Additional seals | Limited or variable | More extensive |
| Plunger or related components | May be excluded | Depends on the kit |
| Best suited for | Targeted replacement | Broader regulator servicing |
A spring- only kit may be acceptable if only the spring and cover gasket require replacement and the rest of the components are serviceable. A more extensive kit may be needed if other seals or interior parts need to be replaced as well.
Compare the included parts and installation requirements rather than assuming that all blue spring kits have the same components.

Symptoms can highlight a fuel delivery issue, but they do not automatically mean the regulator spring needs upgrading.
Hard Starting or Rough Running:
Experiencing difficulty starting or running smoothly can be a result of injector issues or other mechanical or electrical malfunctions. These symptoms are not exclusive to a faulty regulator spring.
Reduced Power Under Load:
Inability to achieve normal power while towing or accelerating can be caused by insufficient fuel delivery. The appropriate diagnostic test to conduct is an inspection of the fuel pressure under load conditions. Testing pressure under appropriate operating conditions can help determine whether fuel pressure contributes to the problem.
Fuel Pressure Below Specification:
A reading below the minimum fuel pressure required by the manufacturer should be investigated further. A weak fuel pump, restricted filters, regulator malfunction, or some other fuel delivery problem may be responsible. Simply replacing the spring without investigating further will only serve to waste time and resources.
Use this checklist to compare products and prevent buying unnecessary parts.
Check your fitment: Make sure that the model year, engine, and regulator are compatible.
Check the part number: Compare the listed number with the applicable service information.
Review kit contents: Ensure that the kit includes the seals, gasket, plunger, and hardware that you need.
Compare quality: See which companies provide clear product details, warranty information, and supplier support.
Test and diagnosis: Check the fuel pressure and investigate other possible issues before concluding that the spring is faulty.
Fuel system servicing also needs proper assembly and cleanliness. If you are not confident in your ability to service diesel engine fuel systems, have a professional do the job and inspect the pressure.
Keeping a Ford 6.0L Power Stroke up and running requires that the fuel pressure be kept at adequate levels and that the right replacement parts be used to perform any necessary repairs. If the truck still has the original regulator spring, upgrading to a blue spring may be an effective way to restore the needed fuel pressure in the case of a faulty spring. Before purchasing, make sure that the product is compatible with your model year, examine the included seals and hardware, and test the fuel pressure to identify the issue.
Do you need replacement bolts, mounting hardware, or other automotive parts and fasteners for your Ford 6.0L Power Stroke maintenance? Explore the wide range of automotive hardware selection at Trachtech Fasteners. These items can be used to assemble the necessary kits or equipment suited to your repair requirements. Review the product specifications and compatibility information to find the right parts for assembly and installation.

The Duramax LLY is one of the most famous 6.6L diesel engines from GM. It was built in the mid 2000’s and it had a reputation for good towing, decent torque, and a fairly simple diesel design. But age and some well-known weaknesses mean buyers and owners should be aware of its potential problems.
Some common LLY Duramax problems are overheating under heavy loads, turbo issues, injector harness issues, glow plug issues, and cooling system issues. The good news is that many problems can be detected early through proper inspection and maintenance.
It’s also important to know the differences between the LLY and the later LBZ, especially if you are looking to buy a used Duramax truck.

The LLY is a 6.6-liter turbocharged diesel engine introduced in the 2004 model year. It is most commonly found on the 2004.5-2005 model years, though some 2006 trucks were equipped with LLY engines as the transition to the LBZ was underway.
The engine features a variable-geometry turbocharger (VGT), electronic fuel injection, exhaust gas recirculation, and a cooling system designed to support demanding towing applications.

Depending on model year and transmission configuration, the LLY produced approximately 310 horsepower and 605 lb-ft of torque in its common automatic-transmission configuration. Its combination of low-end torque and turbocharged power made it well suited to heavy-duty Chevrolet Silverado and GMC Sierra applications.
The LLY can still provide impressive service today, but most examples are now many years old. Condition, maintenance history, and previous repairs can therefore matter more than the engine badge alone.

When owners talk about LLY problems, several problems pop up again and again. Knowing the symptoms can help diagnose a problem before it becomes an expensive repair:
Overheating During Heavy Loads: One of the most talked-about issues of the LLY Duramax is overheating, especially in situations like towing or going up steep hills. During hard work, the cooling system of the LLY has to dissipate large amounts of heat.
Restrictive Turbo Inlet: The factory turbo inlet design can cause an airflow restriction to the turbocharger. This deficiency can be more noticeable when the engine is under strain. A clogged inlet means less air flowing through and more work for the turbo.
Variable-Geometry Turbo Problems: The LLY’s VGT turbocharger has adjustable vanes to control exhaust flow and boost. Over time, carbon build-up, mechanical wear, sensor faults, and other related problems can affect the way the turbo operates.
Injector Harness Problems: Injector wiring can have problems with connections. Since the injectors need the electrical signals, issues with the wiring can lead to the engine running roughly or having misfires.
Glow Plug and Control-System Issues: Glow plugs help the diesel engine start properly when it is cold. Old glow plugs or issues with the system that controls the plugs can make it harder to start the engine when it is cold.
Water Pump and Cooling-System Failures: Aging of Cooling-System components can lead to coolant leaks that reduce circulation. When the Water Pump fails, engine temperatures can rise, especially on hard drives.
What to check: Coolant leaks should never be ignored, because running the engine without cooling can create far more serious engine problems.
Head-Gasket Concerns: Head-Gasket failure is not always an LLY problem, but repeated overheating can raise the risk of serious engine damage. That is why temperature management matters a lot on an LLY.
What to check: An overheating problem should be diagnosed as being ignored or driven through again.
The 2004 Duramax can be confusing because GM used both the LB7 and the LLY in that model year. The LLY was introduced during the 2004 model year, which’s why many fans call some trucks 2004.5 models.
If you are researching a 04 LLY Duramax, do not rely on the truck’s registration year. Verify the engine by checking the vehicle identification information and the proper engine identification details because replacement parts do not fit an incorrect engine identification. Therefore, when you look into 2004 Duramax issues, first find out whether the truck has an LB7 or an LLY engine.
The 2005 model year is closely linked to the LLY, so the 2005 model year is a pick for buyers who want an older Duramax. The main concerns are cooling system performance, overheating under load, turbocharger-related problems, electrical problems, and normal age-related wear.
A well-maintained 2005 truck can still be a capable workhorse. However, buyers should focus on service history rather than assuming that every 2005 truck with the same engine will have identical reliability.

The 2006 LLY Duramax is in a transition period because GM switched from the LLY to the LBZ.
Therefore, finding the exact engine is very important when you buy replacement parts or look up specifications.
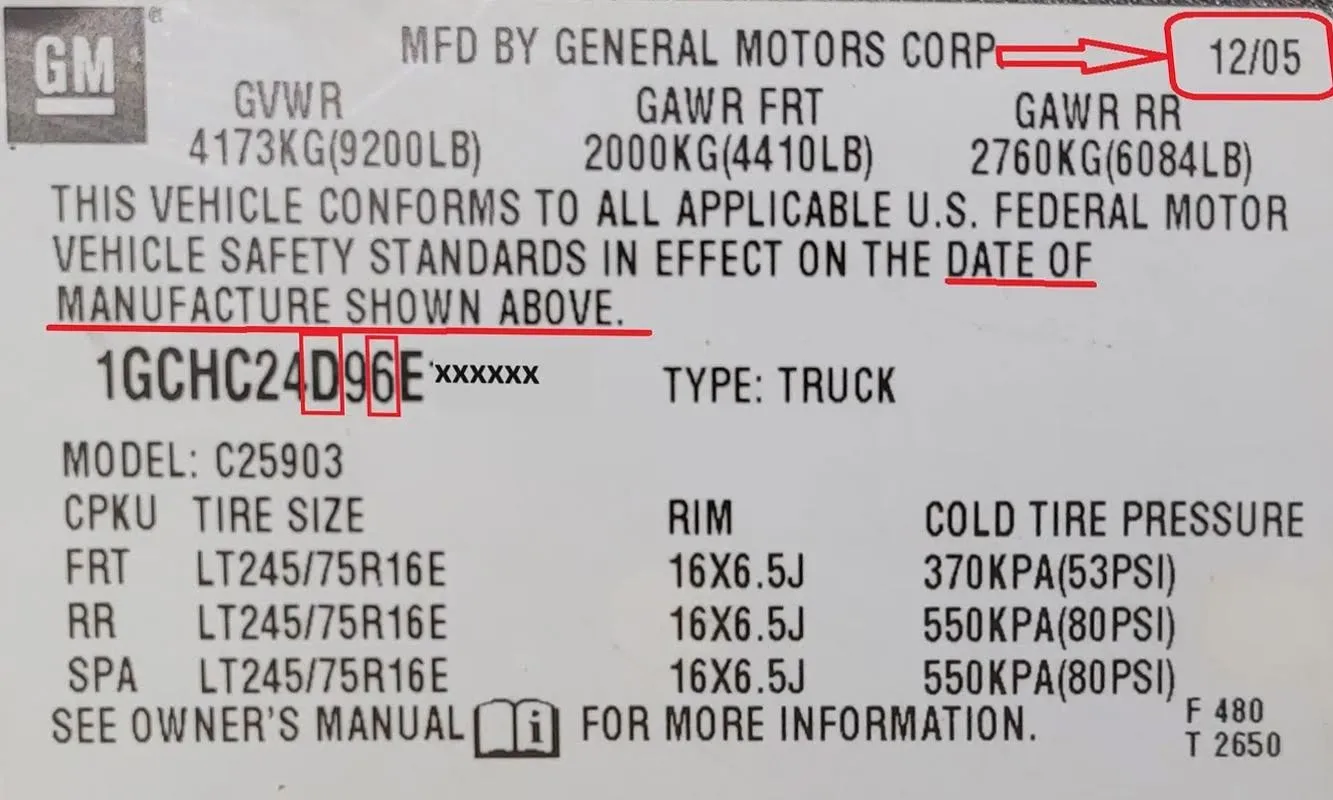
Two trucks from the same model year can cause confusion when owners look for replacement parts. Before you order parts, check the engine configuration, VIN details, and application needs.
| Feature | LLY Duramax | LBZ Duramax |
|---|---|---|
| Engine | 6.6L V8 diesel | 6.6L V8 diesel |
| Typical output | Around 310 hp / 605 lb-ft | Around 360 hp / 650 lb-ft |
| Turbo | Variable-geometry | Variable-geometry |
| Era | 2004.5–2006 transition period | 2006–2007 |
| Reputation | Strong but has cooling concerns | Highly praised |
| Key advantage | Lower purchase cost on many used trucks | More power and strong reputation |
The LBZ has a factory‑output advantage. It has 360 horsepower and 650 lb‑ft of torque, giving the LBZ stronger performance than the earlier LLY. However, performance numbers should not be the buying factor. A maintained LLY, with a strong service history, can be a better purchase than a neglected LBZ that has significant mechanical problems.
The LBZ is often seen as one of the older Duramax engines, but it can have issues. Cooling problems that come with age, issues with the fuel system, wear on the turbocharger, electrical problems, and general parts getting worse over time can impact an LBZ.
If the highest factory performance is what matters most, the LBZ has an edge. If the cost to buy and the overall condition are more important, a checked LLY can still be a good choice.
An LLY can still be used as a diesel engine if the truck has been properly maintained.
Before buying, you should take care of the following concerns:
A clean, well-maintained LLY can provide strong towing ability without needing the premium price that some LBZ trucks demand. The key is that buying should be based on the condition of the truck, not on the reputation of the engine.
Duramax repairs can involve Duramax components that are subjected to heat, vibration, pressure, and mechanical forces. The correct fastener should match the application rather than simply fitting the hole. When selecting a replacement fastener, ensure that you check the thread diameter, pitch, length, material, strength grade, and the application requirements.
Using an incorrect fastener can cause fitment and reliability issues, especially with demanding diesel applications. Tracktech Fasteners can help you with fastener solutions for every Duramax repair and diesel application.
The LLY Duramax is still a trusted diesel engine, but there are some problems that people who own it should be aware of. There are issues with the turbocharger, the wiring for the injectors, the glow plugs, and the cooling system.
The LLY versus LBZ comparison is not as simple as picking the more powerful engine. The LBZ has power from the factory and has a very good reputation. If the LLY is taken care of properly, it can still work very well.
If you are looking into problems with a 2004 Duramax, a 2005 Duramax, or a 2006 LLY Duramax, make sure you know exactly which engine is in the truck and check the truck carefully. If you take care of a Duramax with the right maintenance, right parts, and properly specified fasteners, it can still be a strong and useful vehicle.

The 7.3 Powerstroke is a tough engine, but even a great diesel engine eventually needs exhaust system repair. The up pipe is one part that is often overlooked. 7.3 Powerstroke Up Pipes carry exhaust gases from the engine to the turbocharger. If these pipes, seals, or connections leak, valuable exhaust energy can be lost before it reaches the turbo.
It can cause ticking or hissing noises, soot around connections, reduced turbo response, low boost, and less engine power. Knowing how it works and what to look for can help you diagnose problems and choose the proper replacement.

The up pipes connect the exhaust manifolds to the exhaust inlet of the turbocharger. Their main function is to direct hot, pressurized exhaust gases to the turbocharger. The turbocharger uses the energy of this exhaust to spin its turbine. The turbine is connected to the compressor, which assists in forcing more air into the engine.
The exhaust system works in a high-temperature environment and is subjected to repeated expansion, contraction, vibration, and movement. If a crack forms in an up pipe or a sealing component fails, exhaust gas can escape before it reaches the turbocharger.
This is crucial because the turbo relies on exhaust energy to spool up the turbine. A big leak can suck the energy out of a turbo and make it spool slower and make less boost.
In simpler words:
Exhaust leak → loss of energy in exhaust → slower turbo response → less boost potential → performance suffers.

Professional diagnosis is a good solution if you can’t pinpoint the cause because getting to the root problem helps avoid the risk of installing replacement parts when it is not needed.

Flexible bellowed exhaust components have bellows that let the system expand or flex when a motorcycle engine is running. The flexible part can make bellowed designs the ideal choice when old factory parts are to be replaced, most of all in the exhaust system.
They can provide a durable advantage in particular because the flexible part is intended to absorb movement and expansion. But not every aftermarket pipe will be an upgrade. When considering a replacement pipe, many aspects may influence the results – how well it functions, is fitted, sealed, and how the manufacturer did the welding, etc.
A 7.3 Powerstroke up pipe kit can contain various parts to perform the repair. The parts can vary according to manufacturer and application, but oftentimes a repair kit will include the up pipes below the head gasket or seals, fasteners, and any other mounting hardware.
The up pipes send exhaust gases to the turbo, and their construction is designed to allow movement and expansion with increasing temperature in the system. Gaskets and seals prevent exhaust leaks, whereas fasteners secure the exhaust connections.
Always check what is in the kit before purchasing. Opting for a full kit may also be easier to work with and can prevent the urge to discover at the time of assembly that a critical gasket, seal, or piece of hardware is absent.
| Model Year | What to Consider |
|---|---|
| Early 1999 | Check exact configuration before ordering |
| Late 1999 | Ensure production/application details |
| 2000 | Check truck or vehicle application |
| 2001 | Ensure exact fitment and kit contents |
| 2002 | Match replacement parts to the vehicle configuration |
| 2003 | Ensure application before buying |

Naturally, the best 7.3 up pipes are not always the cheapest ones. Make sure you find the right combination of fitment, construction, sealing, and long-term durability.
Not every single replacement has to happen on both sides. But if your original up pipe on one side was a total loss after years of working, the best thing is for you to have a very close look at the other side as well. Similar age, corrosion, or signs of decay are among the things that could mean the second one needs attention too.
Replacing both is often a wise move if both sides have worn out quite a lot or if there is limited access so that only one repair at a time would be possible. To make the right decision, you would ultimately need to rely on close examination and condition analysis of the existing ones.
Replacement of up-pipes can be quite difficult because the system is located in a very limited space.
Generally, this repair takes several steps, such as accessing the components, taking them out, checking the sealing points and their hardware, putting the new items in place, and looking for any leaks.
The difficulty of the process model is directly impacted by corrosion and the accessibility of the components.
If you are not skilled enough with exhaust repair, it would be much better to let professionals do the job.
In most cases, replacing an up pipe is the most reliable solution when it is broken, severely corroded, or structurally compromised.
However, if the pipe is in good shape but the problem is confined to a seal or gasket that can be replaced, replacing that part could fix the issue.
The overall expenses depend on:
Labor costs may be substantial as the pipes are difficult to access. That’s why you should compare the total repair cost and not just the price of the pipes, choosing a kit that includes the necessary seals and parts instead of buying single components.
Up pipes: Responsible for transporting engine exhaust gases from the exhaust manifold to the turbocharger.
Downpipe: Responsible for transporting exhaust gases from the turbocharger to the rest of the exhaust system.
It is important to understand the difference in order to be able to diagnose a problem or purchase replacement components. The downpipe problem should not be treated as the same problem as an up pipe leak.
7.3 Powerstroke up pipes are crucial in transporting exhaust energy from the engine to the turbo. In the case of leaks, one can notice signs such as strange sounds from the exhaust system, soot accumulation, slower turbine response time, a weak boost, and overall weakened performance.
Opt for quality parts instead of cheap ones when selecting replacements. Take into account aspects such as fitment, quality of the material used for manufacturing, bellow structure, sealing elements, contents of the kit, and type of fastenings used.
Tracktech Fasteners provides a resource for automotive and fastening needs, making it worth considering when a 7.3 Powerstroke repair requires replacement hardware.

The first-gen Cummins is in a league of its own in diesel-truck history. The 5.9-liter inline-six was first introduced in 1989 model-year Dodge pickups, helping to establish the Cummins name as a synonym for durability, torque, and long-term serviceability.
The original Cummins design was remarkably mechanical, as opposed to so many modern diesels that rely so heavily on electronic controls. The 1st gen Dodge was simple and dependable because of its 12-valve cylinder head, Bosch VE rotary injection pump, turbocharger, and heavy-duty build.
Today the 1st gen Dodge Ram is still a favorite with collectors and diesel enthusiasts, work truck owners, and those who love mechanical diesel technology. If you are restoring a truck, maintaining an original, or looking for replacement hardware, understanding this generation is critically important.

The 1st Gen Cummins is Dodge’s first generation of pickups with the 5.9L Cummins diesel. It mostly encompasses 1989-1993. These trucks came in several versions, including the D250, D350, W250, and W350. The Cummins engine changed Dodge’s place in the heavy-duty pickup market with its big low-rpm torque and a diesel platform built for tough work.
The engine itself was derived from Cummins’ 6BT platform. It was an inline-six, displacing 5.9 liters with 12 valves, direct fuel injection, and mechanical fuel-system parts.
| Specification | 1st Gen Cummins |
|---|---|
| Model years | 1989–1993 |
| Engine | 5.9L Cummins 6BT |
| Configuration | Inline-six |
| Valvetrain | 12-valve |
| Displacement | 5.9L / 359 cu. in. |
| Injection system | Bosch VE rotary pump |
| Factory horsepower | Approximately 160 hp |
| Factory torque | Approximately 400 lb-ft |
| Turbocharger | Holset H1C |
| Bore | Approximately 4.02 inches |
| Stroke | Approximately 4.72 inches |
| Compression ratio | Approximately 17:1 |
Output from the factory varied by model year and configuration, but the number most often quoted was about 160 horsepower and 400 lb-ft of torque.
It’s that torque-centric power delivery that explains how the 1st gen Ram became such a capable work truck.
The original Cummins was not built for big peak horsepower numbers. It had the virtue of providing useful torque at relatively low engine speeds. With some 400 lb-ft of factory torque, the truck had no lack of pulling power for towing, hauling, and hard work. That was a big deal for an engine released over three decades ago: that combination of displacement and torque. The mechanical fuel system also meant that the engine was relatively easy to diagnose and service compared to newer electronically controlled diesel engines.

The 1st gen 12-valve Cummins has a Bosch VE rotary injection pump. The VE system is mechanically operated, unlike the electronically controlled fuel systems of later diesel engines.
Simplicity is one of the defining characteristics of the platform.
You can learn fuel delivery, engine operation, and many troubleshooting procedures without modern electronic diagnostic equipment.
The VE pump is also important when modifying or restoring an older Cummins because fuel system condition has a direct bearing on starting, drivability, and performance.
The early first-generation trucks were non-intercooled. Intercooling was added during the first-generation production run, and later trucks generally received the intercooler setup. When buying or restoring a truck, check the actual model year and configuration, and do not assume that all first-generation trucks had the same equipment.
Manually equipped trucks are very popular with people who like driving because they let the driver have more control and work well with the engine’s powerful low-rpm torque. Automatic-equipped trucks were also available, including some Chrysler automatic transmissions that were used during this time.
When looking at a Dodge first-generation Cummins, the transmission should get just as much attention as the engine. Look for problems with shifting, slipping, strange sounds, fluid leaks, wear on the clutch in trucks, and signs that there have been repairs done before.
Fuel economy shifts a great deal when you examine gears, transmissions, truck setups, how heavy the load is, the size of the tires, how a driver moves the vehicle, the condition of the engine, and any extra modifications. Because these trucks have been around for decades, it is not fair to compare a modern published fuel‑economy figure with the real‑world mileage of an original truck. Many owners value the 1st gen Cummins mainly for its usable torque and for diesel operation rather than for a single miles‑per‑gallon number.

The strong low‑end torque from the 5.9‑liter engine makes these trucks very good for towing and hauling. But towing capability depends on the complete truck, such as the axle ratio, transmission, brakes, suspension, tires, cooling system, and factory ratings, so you should look at the entire truck before deciding, not just the engine torque.

Mechanical Simplicity: The first-generation Dodge Cummins parts has a design that is not complicated at all. It has electronic parts. It is easier to take care of and fix when necessary.
Strong Engine Construction: The engine’s 5.9L inline-six features a cast-iron block and strong parts inside. This helps the engine to be long-lasting and reliable.
Proven Work-Truck Character: The first-generation Dodge Cummins has a frame. It has a lot of torque from the diesel engine. The simple mechanical systems make it a good work truck. This truck is still very popular with enthusiasts today.
Killer Dowel Pin: The front gear housing has a locating dowel pin that can be a problem on engines if it becomes loose and shifts. Because of this, many owners check this area during routine maintenance or big engine projects.
Fuel-System Wear: The VE injection pump, lift pump, fuel lines, and other parts are now decades old. Damage or dirt can lead to hard starting, poor performance, or fuel delivery issues. A complete check of the fuel system is very important for a truck that has been sitting for a long time.
Cooling-System Issues: Old hoses, radiators, thermostats, water pumps, and other cooling system parts can cause issues even if the engine is still in shape. Cooling system evaluation should be a priority on any project with long-term intentions.
Transmission, Clutch, and Hardware Wear: A truck that has been used for years to pull or carry loads may have a lot of drivetrain damage. Mounting parts, brackets, exhaust manifold, suspension bolts, and other hardware can also be affected by rust, shaking, or many heat changes. This is where replacing questionable hardware with the right bolts can be a key part of a good repair.

Owners should regularly inspect:
When restoring a diesel truck, one often has to remove hardware that has sat for decades in vibration, moisture, road debris, and engine heat. When repairing exhaust systems, brackets, engine components, suspension parts, or drivetrain assemblies, one must consider the fastener’s:
Avoid picking replacement hardware by appearance. The correct specification depends on the application. Tracktech Fasteners can be a resource for replacement automotive fasteners for restoration, repair, and maintenance projects. Always match the fastener to the manufacturer’s or component supplier’s specifications. Use the correct torque procedure.
If you are not sure whether your truck is a first-generation model or not, check its model year and VIN information, and look at the engine.
Some of the main features that you are supposed to look for when determining a first-generation include :
Note that a first-generation truck can also be identified by the fact that it has a non-VIP body. The thing is that you should be careful here and double-check that the truck was not modified because owners tend to make engine swaps, add various aftermarket parts, and upgrade their transmissions, among other things.
The first generation has a classic look, simple mechanics, and the original 5.9L 12-valve Cummins feel.
The second generation, which came out for the 1994 model year, had a new Dodge truck design and later added different Cummins fuel-system methods.
For people who love the earliest Dodge-Cummins setup, the first generation has special charm. For someone who likes newer styling, extra features, and a wider range of later versions, a second-generation truck could be better.
The first-generation Cummins established a standard that is still revered by diesel enthusiasts to this day. The 5.9‑litre inline‑six engine, with fuel injection, delivers great torque and keeps things simple.
Now, keeping a first‑generation Cummins alive needs knowledge of the engine and the age of the vehicle. Proper maintenance, inspections, quality parts, and correct fasteners all contribute to the longevity of the trucks. If you love diesel pickups, the first‑generation Cummins is one of the most important chapters in Dodge and Cummins history.

When turning the key or pressing the start button in our vehicle, we’re relying on a complex harmony among air, spark, and fuel to generate power. And if something goes wrong with these three, our engine’s performance will most likely be dramatically affected. Among the list of possible things that can go wrong, low fuel pressure takes the cake in terms of “things you don’t want to experience.”
Regardless of what type of vehicle you have, from a daily driver to a highly modified machine, or even a Powerstroke, Duramax, or Cummins-powered diesel truck, learning what low fuel pressure means and how to address low fuel pressure is essential in keeping your machine healthy. Low fuel pressure leads to combustion issues in the chamber, increased EGTs, and can eventually lead to total engine failure.
In this article, we’ll take a close look at the symptoms, causes, diagnosis, and solutions for low fuel pressure, and get your engine back to proper working condition.
Low fuel pressure is a condition wherein the fuel pump is unable to supply fuel to the engine at a pressure level as desired by the manufacturer. Modern engines require high pressure to properly atomize the fuel in the combustion chamber. A drop in the fuel pressure below the calibrated level causes the engine to experience a lean air-to-fuel ratio. It results in poor performance, lack of power, difficulty in starting, and internal engine damage, especially when operating under a heavy load. This malfunction may trigger diagnostic trouble code P0087, among others.

Being able to recognize the symptoms of low fuel pressure promptly will save you a fortune on engine repairs. The signs that the delivery of fuel is inadequate allow you to troubleshoot and fix the issue before the lean air-fuel mixture burns the cylinder walls and pistons.
Below are the primary symptoms of low fuel pressure experienced by drivers.
The fuel injectors can’t atomize enough fuel to start the engine if the fuel pressure drops below a certain level, resulting in long crank times before the engine finally starts.
When accelerating, you are calling for richer air-fuel mixtures, which the engine can’t provide if the fuel pressure is too low. This causes the engine to hesitate, stutter, or stumble.
A lean air-fuel mixture doesn’t always combust completely and evenly, causing either random or cylinder-specific misfires and rough idle. The Check Engine Light may also appear, displaying a P0087 code (fuel rail or system pressure too low) as well.
Low pressure is most noticeable under full load. If you feel like your engine just can’t maintain speed on the highway, when climbing hills, or when towing behind your vehicle, it could be a sign of restricted fuel flow.
If the pressure drops below the minimum required to maintain idle speed, the engine will begin to sputter and die at idle or when coming to a stop.

There are a lot of potential reasons for low fuel pressure since an automobile fuel system consists of multiple parts. Therefore, many different things need to be functioning properly for your car to operate properly and have enough fuel pressure.
Here are the most likely causes of low fuel pressure for your case:
As the fuel filter becomes clogged with dirt, rust, and deposits, the restriction in the filter increases. The fuel pump has to work harder to push fuel through the filter. This results in reduced flow rate and pressure at the fuel rail.

Low fuel pressure can be produced if the fuel pump itself begins to fail or lose pumping strength. This happens as the fuel pump (either the low-pressure in-tank lift pump or the high-pressure engine-driven pump) wears out internally, loses its impeller clearance, or becomes overheated due to running the fuel tank low.
The fuel pressure regulator maintains the pressure in the fuel system by directing any excess fuel back to the tank. The internal diaphragm or spring in the regulator can stick open, allowing excessive fuel return and reducing pressure in the fuel rail.

If the injector remains open, the fuel pressure will drop rapidly when the engine is turned off. There is also a whiff of dark exhaust-manifold smoke when the fuel-injection pump delivers fuel to the leaking nozzle.

Crushed lines underneath the chassis, kinked hoses, or corroded passages in the fuel lines can cause a pressure drop in the fuel line, resulting in insufficient pressure at the fuel rail before the fuel reaches the engine bay.
Poor grounding, blown fuses in the fuel pump circuit, and faulty wiring and relays can cause the fuel pump to lose power supply or receive less power than required. It runs below its rated capacity.
Physical and Visual Inspection: Check the undercarriage of the vehicle for crushed fuel lines, rusted fittings, and signs of active fuel leaks. Check the smell of fuel around the engine, specifically at the rails and pressure regulator, for the presence of unburned fuel.
Check the Fuses: Check the fuses and relays associated with the fuel pump. Check the voltage at the fuel pump electrical connector with a voltmeter. The proper voltage with the key on should be at least 12 volts.
Mechanical Fuel Pressure Test: With an appropriate mechanical fuel pressure gauge, either on a Schrader valve or via an inline adapter, test the fuel pressure on the rail. With the motor running, observe the fuel pressure at idle, during acceleration, and under load. Compare the observed numbers to the specifications in the OEM service manual.
Fuel Pressure Holding Test: With the key on, prime the system so that the fuel pressure reaches its normal operating parameters. Then, turn the key off and observe the fuel pressure on the gauge. Pressure drop indicates a leaking injector, a faulty regulator, or a defective check valve in the fuel pump. Gradual pressure increase upon priming indicates a clogged fuel filter or restricted fuel line.
The most cost-effective solution for a clogged fuel filter is to replace it. It is recommended to replace it every 20,000 to 30,000 miles, depending on the manufacturer’s instructions.
If fuel is allowed to bleed back via the vacuum hose on a mechanical regulator or fails an electrical resistance test on an electric one, the pressure regulator should be replaced.
If the voltage is sufficient but the fuel pump can only produce less than the minimum psi recommended by the manufacturer, the fuel pump assembly must be replaced. During this procedure, the fuel tank should be cleaned to remove any dirt that could clog the new fuel pump.
Professional ultrasonic cleaning or injector replacement will eliminate the possibility of improper atomization and pressure loss due to faulty injectors.
While resolving abnormal fuel pressure loss restores proper delivery, heavy load operation or high boost plus restored fuel delivery can place enormous strain on engine components.
High cylinder pressures created during the restoration of fuel pressure can distort factory cylinder heads when engine components are weak or not properly torqued. It leads to serious engine damage and loss of engine power.
When working on highly modified fuel systems, high-pressure oil systems (HPOP), or internal engine components on gas and diesel engines, upgrading to higher tensile strength fasteners is a must.
The right hardware can withstand the extreme torque loads generated by big engines, high boost pressure, and cylinder pressures.
Industry-leading components from Tracktech Fasteners offer laboratory-tested and track-proven tensile strengths up to 240,000 PSI. This allows head studs, main studs, and high-pressure fuel system hardware to keep the engine block and heads properly clamped under extreme pressure and torque. Upgrading during engine or fuel system rebuilds is an advantage to ensure the quality and performance of the installed clamping hardware.
Avoiding the causes of fuel shortage is much easier than trying to deal with the consequences. It is vital to remember that a gas tank should not be lower than a quarter full, change fuel filters regularly, and use high-quality fuel with good detergents. Doing this will help to keep injectors clean and reduce the likelihood of high-pressure components failure while maintaining proper pressure throughout the engine’s lifetime.

When your heavy-duty Ram truck’s check engine light glows, it can turn your day from good to awful, especially if the P2509 diagnostic trouble code appears. This situation is especially undesirable when it comes to the P2509 code (6.7 Cummins) or P2509 (5.9) because it indicates an electronic malfunction in the vehicle’s powertrain.
Being able to address the P2509 Cummins problem correctly can save you time, money, and panic as a vehicle owner. It can also protect your investment by preventing ECM failure or malfunctions. If your engine’s start-up has become unpredictable or if your dash lights are being uncharacteristically fickle, this guide to P2509 Cummins repair will show you what to do.

In technical language, Dodge DTC P2509 means “ECM/PCM Power Input Signal Intermittent.” This happens when the Engine Control Module, or ECM, the brain of your P2509 Dodge Cummins, loses its continuous flow of clean battery power to correctly calculate fuel injection timing, boost pressure, and transmission shifts.
Basically, your engine’s brain needs a steady stream of electricity to do its job correctly. Any deviation from this, a dip or spike in current, causes it to throw up the Dodge code P2509, the “ECM/PCM Power Input Signal Intermittent” error.


Sometimes it is not easy to detect a P2509 Dodge Cummins failure by simply looking at the system. This is because the strands of the wires inside the connectors may have broken due to corrosion. To do so, professional diesel mechanics perform a voltage drop test.
How to Perform the Test: Set your digital multimeter to direct current (DC) volts. Probe the positive battery terminal with the red lead and the ECM power supply pin with the black lead, with the key on or while cranking.
The Threshold: Any more than 0.5 volts means that you have too much resistance in that circuit. If you find excessive voltage drop across a cable or relay, you have found the exact cause of the restriction. Clean or replace the circuit to eliminate the fault code.
Remove battery terminals once a year and clean white or blue spots (corrosion) with a wire brush and baking soda solution. Re-treat with terminal protection spray.
Most heavy-duty diesel batteries have a 3-5 year lifespan. If your batteries are nearing the end of their lifespan, be sure to replace them in pairs to avoid draining the good battery.
Check engine bay wiring harnesses are clipped away from hot exhaust manifolds, sharp metalwork edges, and other sources of high-frequency mechanical vibrations.
One of the most common mistakes that Ram owners make is attempting to replace only one battery on their dual system after discovering that it is dead. The reason why Ram uses a parallel dual battery system for the Cummins engine is that it provides higher cranking amps necessary to turn over a high-compression diesel engine.
Therefore, if one of the two batteries begins to fail due to internal short circuits, it essentially becomes a load on the second good battery. This causes numerous voltage irregularities that can lead to P2509 error codes. To prevent this from happening, make sure you always replace two batteries at once as a set.
Most modules that run your trucks were designed to withstand the abuse they see, but heat cycles and water infiltration will catch up to the best of them. Here’s some advice that keeps electrical systems healthy:
Clear Cowl Drains: Make sure the drains along the lower edge of the windshield cowling are free of obstruction. Water that can’t exit the vehicle will often find its way into the Total Integrated Power Module (TIPM).
No Pressure Washing Fuse Blocks: When cleaning the engine compartment, avoid getting high-pressure water on electrical fuse blocks, computer connections, or sensor plugs.
Apply Dielectric Grease: A thin coating of dielectric grease on the terminals of large engine harness connections will keep moisture out and short circuits at bay. The same goes for small sensors and switches.
When it comes to solving the complex issues of ailing engines or rebuilding an aging Cummins powerplant plagued by parasitic drains and aggressive turbocharging, don’t forget about the big picture. Upgraded internal components are vital to withstanding the increased cylinder pressures created by high-performance modifications.
With the help of upgraded hardware like Tracktech Fasteners cylinder head studs, you can achieve the maximum clamping force necessary to keep high-output diesel engines operating at peak efficiency. Whereas OEM head bolts lack the strength to maintain optimal torque figures when exposed to extreme temperature fluctuations, Tracktech Fasteners products are engineered to resist loosening and provide the highest grade of security, reliability, and performance.
If addressed quickly, P2509 will help free your Cummins’ sensitive electronics from a potentially serious malfunction. By ensuring that the battery is well-maintained, grounds are secured, and considering hard industrial-grade accessories such as Tracktech Fasteners, you can be certain that your heavy-duty truck will provide maximum reliability and power.

Maintaining the fluid levels and change intervals for a 6.0L Powerstroke V8 turbo diesel engine is of utmost importance. This engine was manufactured by Ford and used in the 2003-2007 model years, and it uses a High-Pressure Oil System (HPOS) to operate the Hydraulic Electronic Unit Injectors (HEUI). The oil being used not only lubricates the engine but serves as a hydraulic fluid to drive the fuel injectors. It is crucial to use the correct fluid and ensure that the fluid capacity is enough to avoid shear, stiction, and expensive engine repair costs.
This blog will discuss everything there is to know about 6.0 Powerstroke oil capacity, fluid types, changing fluid, coolant type for 6.0L Powerstroke, and other relevant information.
When performing a standard oil and filter change, the 6.0 Powerstroke oil capacity is 15 quarts (14.2 liters), or 3.75 gallons. This statement holds for all model years, so a 2003 6.0 Powerstroke oil capacity is the same as a 2006 6.0 Powerstroke oil capacity. The capacity is the same for all trucks with this motor, be it the F-250, F-350, F-450, or Excursion.
Oil Pan Capacity: holds the majority of the 15 quarts
Oil Filter Housing: holds about a quart
High Pressure Oil Reservoir & Lines: holds the amount of oil not let go during an oil change.
Since some oil remains in the high-pressure pump reservoir and rail system, a dry engine would require slightly more than 15 quarts to fill. But for regular maintenance, 15 quarts will bring the oil level directly to the top of the dipstick.
Drivers often look for certain model year capacities to see if the Ford changed the oil pan size. On the table below is the fluid specification for all manufacturing years as well as the popular trim options, like the 2006 f250 6.0 oil capacity, for example.
| Model Year | Engine | Standard Oil Capacity (With Filter) | Recommended Viscosity |
|---|---|---|---|
| 2003 | 6.0L Powerstroke V8 Turbo Diesel | 15 Quarts(14.2 L) | 15W-40/5W-40 |
| 2004 | 6.0L Powerstroke V8 Turbo Diesel | 15 Quarts(14.2 L) | 15W-40/5W-40 |
| 2005 | 6.0L Powerstroke V8 Turbo Diesel | 15 Quarts(14.2 L) | 15W-40/5W-40 |
| 2006 | 6.0L Powerstroke V8 Turbo Diesel | 15 Quarts(14.2 L) | 15W-40/5W-40 |
| 2007 | 6.0L Powerstroke V8 Turbo Diesel | 15 Quarts(14.2 L) | 15W-40/5W-40 |
Regardless of the year you own, whether it is a 2003 model or the more recent 2006 f250 6.0 oil capacity, you should buy 4 gallons (16 quarts) of oil to have an extra quart as a reserve.
Selecting the appropriate 6.0 Powerstroke oil type is critical because of the high mechanical stresses on the oil from the HEUI system. The fuel injectors use the high-pressure oil pump to create up to 3,000 PSI of pressure needed to atomize diesel fuel, which puts enormous shear forces on the oil.
15W-40 Heavy Duty Diesel Oil

Recommended For: Engines operated in warm ambient temperatures (over 30F/-1C) and where maximum towing capacity was required.
Type: Conventional, Synthetic Blend or Full Synthetic.
This is the recommended diesel oil grade for normal operating conditions in most cases.
5W-40 Full Synthetic Diesel Oil

Recommended For: Lower ambient temperatures (under 30F/-1C) operation throughout the year, including severe conditions.
Type: Full Synthetic.
It reduces start-up friction in cold weather to virtually eliminate cold start injector hesitation.
10W-30 Heavy Duty Diesel Oil

Recommended For: Normal ambient temperatures with less demanding usage profiles where the benefits of 15W-40 are required but the expense of a full synthetic is undesirable.

Looking for the best oil for 6.0 Powerstroke engines is really just looking for a high-quality heavy-duty engine oil (HDEO) which carries API CK-4 or CJ-4 ratings and isn’t susceptible to viscosity shear.
Top Recommended Oils
To prevent or remedy fuel injector stiction (gummy deposits that cause the spool valves in the injectors to stick), many owners use an anti-wear friction modifier as an additive when changing the oil, such as Archoil AR9100 or Hot Shot’s Secret Stiction Eliminator.
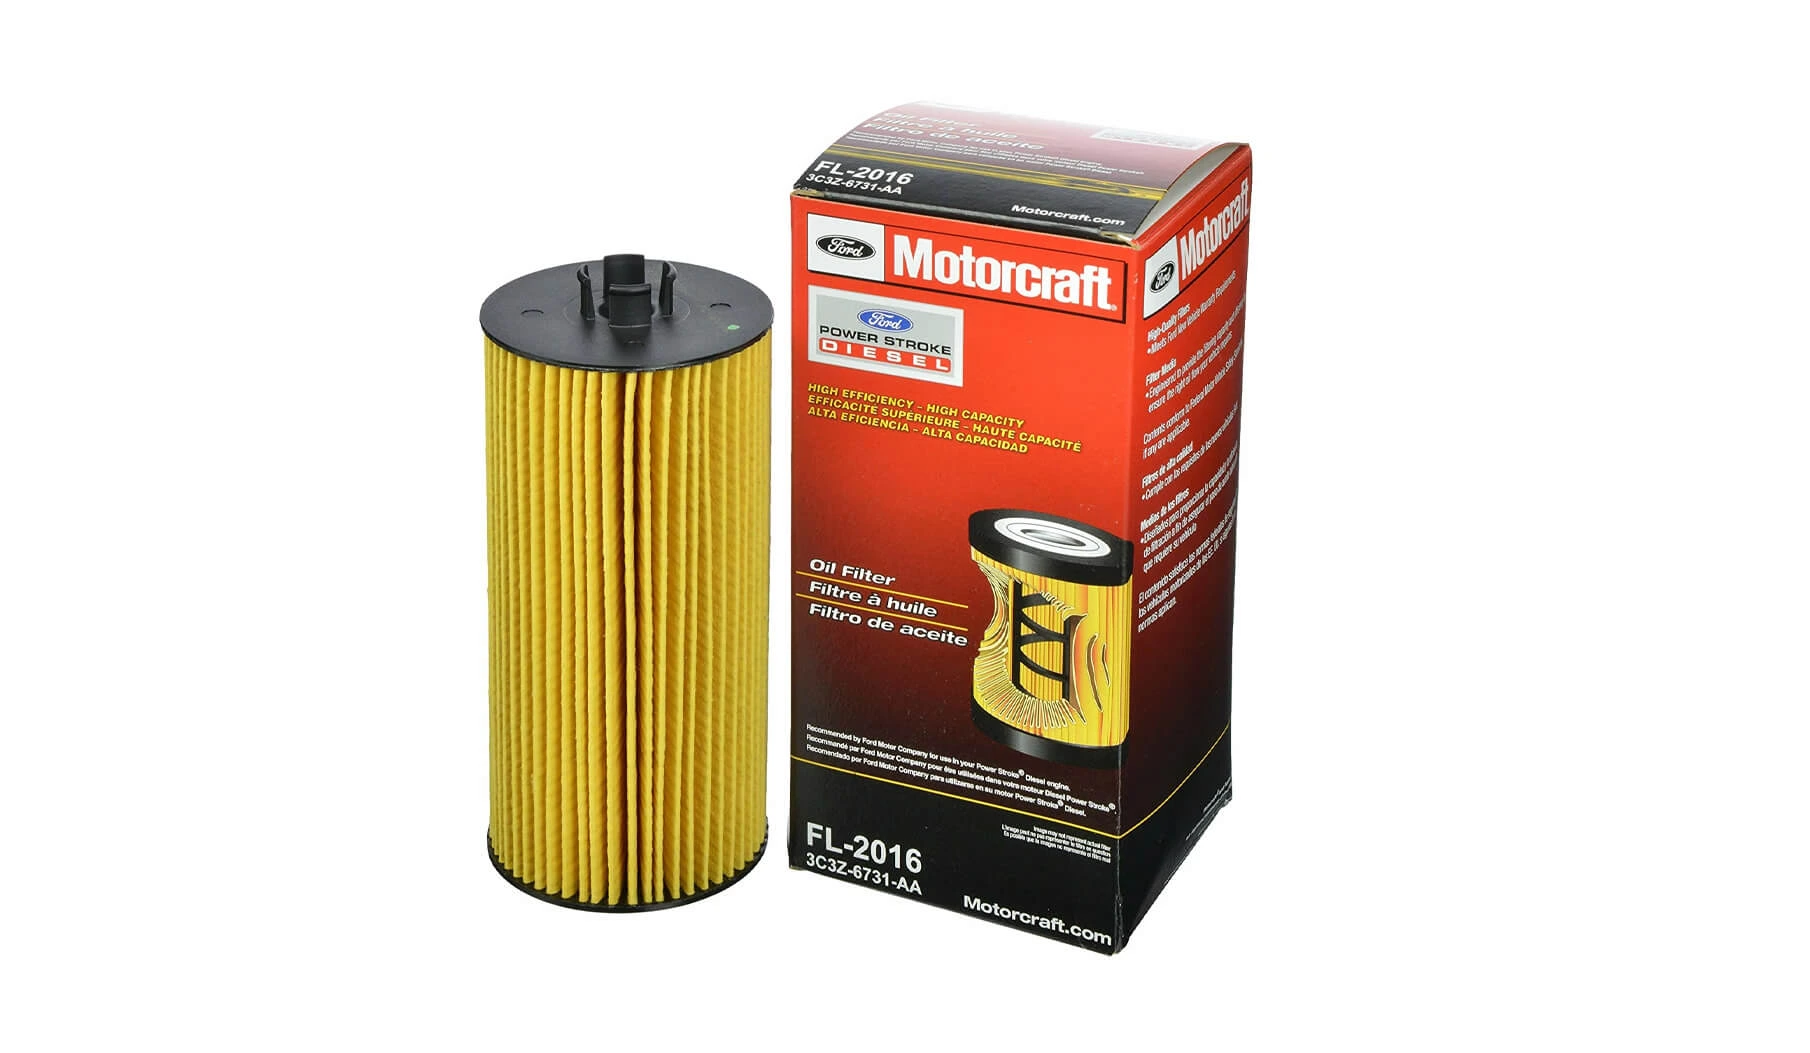
One of these changes requires oiling the engine after every 5000 miles or 3000-4000 miles if towing heavily.

Warm Up the Engine:
Let the engine run for 5-10 minutes to warm up the fluid. The warmer the fluid, the better it is to detach contaminants and drain completely.
Remove the Oil Filter First:
Use a 36 mm socket to remove the top-mounted oil filter cap on the driver side of the engine bay. The action will open a safety drain valve stem seal inside the housing to let the trapped oil drain down the pan before removing the drain plug.
Drain the Oil Pan:
Place your drain pan underneath the oil pan and remove the 19 mm drain plug. Allow the oil to drain completely (about 10-15 mins). Check the threads of the drain plug and replace the O-ring gasket if needed. Reinstall the drain plug and tighten to 33 lb-ft.
Install the New Oil Filter Element:
Snap out the old oil filter from the cap. Remove the old rubber O-ring from the cap threads, grease the new O-ring, and install it. Screw in the new Motorcraft FL-2016 oil filter till it’s tight and then secure the cap to 18 lb-ft. Do not over-tighten the cap.
Filling with Fresh Oil:
Remove the oil fill cap on the passenger side valve cover. Add in 14 quarts of the selected Ford 6.0 oil capacity volume and check with the dipstick. Let the engine run for 2 minutes to circulate the oil in the filter housing before turning it off. Wait for about 5 minutes, then top up with the 15 th quart until it reaches the clean spot on the crosshatched dipstick.
Alongside checking the 6.0 Powerstroke oil capacity, make sure the vehicle’s cooling system is properly maintained to prevent EGR cooler failures and oil cooler clogs. Below you can find information about 6.0 Powerstroke coolant capacity, recommended coolants, and maintenance notes.
Total cooling capacity for the 6.0 Powerstroke is 27.5 quarts or 26 liters of coolant (equivalent to 6.87 gallons).
Recommended Coolant Types
The 6.0 Powerstroke is a liquid-to-liquid internal oil cooler inside the engine valley. Engine coolant is passed through the oil cooler to reduce oil temperatures. Silicates in improper coolants can cause gelation and blockage of the oil cooler passages reducing coolant or oil delta spread and oil temperatures over the maximum allowed 15°F. Over-coolant temperatures will result in accelerated oil degradation, injector failure, and turbocharger damage.
While proper maintenance of oil levels and temperatures is important in keeping internal components healthy, making upgrades to other areas can help prevent failures. The high pressure and temperatures from within the engine can cause the OEM head bolts to fail and result in catastrophic head gasket failure.
By upgrading to higher tensile head studs and using quality hardware from Tracktech Fasteners, you can ensure that your engine maintains its integrity under the increased stress from towing and high-pressure environments. Coupled with proper maintenance, heavy-duty hardware can give your Powerstroke years of reliable service.
Being aware of your Ford 6.0 oil capacity and performing changes every 5000 miles is essential to keep your vehicle running for a long time. Using 15quarts of 5w-40 or 15w-40 diesel oil, changing FL 2016 Motorcraft filters, and filling the engine with silicate-free ELC coolant are the best ways to keep your 6.0 Powerstroke coolant capacity and High-Pressure Oil System in good condition for as long as possible.

Does your car have problems with slow acceleration, engine misfires, and low gas mileage? These symptoms indicate that there is a problem with a fuel pressure sensor. You may need to replace your fuel rail pressure sensor or check your fuel pressure regulator symptoms. When the fuel pump sensor is faulty, or there is erratic fuel rail pressure, it might lead to serious problems in the engine and even create dangerous situations on the road.
In this blog, we will show you how to recognize the most common symptoms of a bad fuel rail pressure sensor. Also, we will provide you with a step-by-step instruction on how to change the faulty fuel rail pressure sensor, as well as instructions on how to read fuel rail pressure sensor diagrams in your car and what to do to solve a problem.
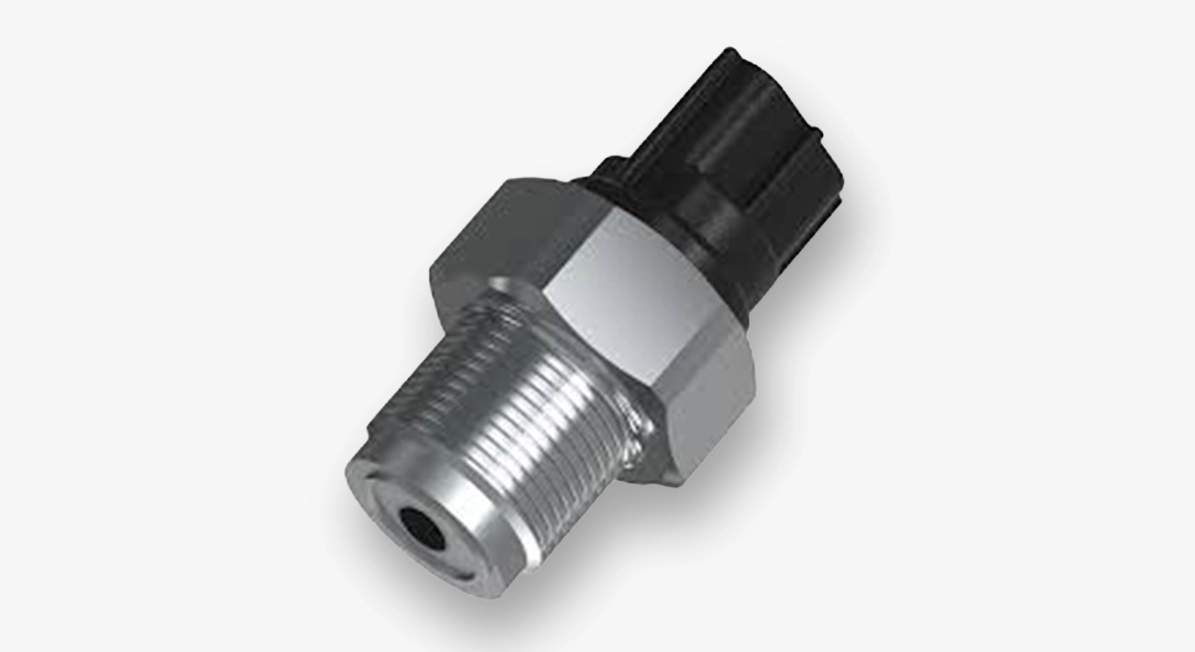
The fuel rail pressure sensor is a vital component of the vehicle’s electronic system, and it measures the fuel pressure in the fuel rail and transmits ongoing data to the Engine Control Unit (ECU). The ECU uses this data to adjust fuel injection timing and duration, ensuring your engine receives the exact amount of fuel required for varying driving conditions.
From heavy load towing to driving on the freeway, this sensor assists the engine in running in an efficient manner. However, the performance will be affected in case of failure of the sensor since the ECU will receive wrong information from the sensor.

Spotting these signs may warrant further scrutiny of your fuel rail pressure sensor symptoms.
Hard Starting or Engine Stalling
If the sensor is malfunctioning, it might send a wrong signal, and the ECU might not supply the right amount of fuel during ignition. This could lead to a situation where the engine cranks but doesn’t start, or worse, the motor could switch off without warning when idling because it has no fuel.
Significant Loss of Power
When you press the accelerator, you expect your vehicle to respond immediately, but inadequate power during acceleration could mean that your fuel rail pressure is incorrect. If the ECU is not receiving the right inputs about the needed pressure, it cannot correct the amount of fuel injecter, thus causing sluggishness.
Reduced Fuel Economy
The faulty fuel pressure sensors can compel the ECU to overestimate or underestimate the requirements of the fuel. In many cases, a bad sensor forces the engine to run “rich”—meaning it burns more fuel than necessary. Thus, one could observe an increased number of visits to the gas stations.
Misfiring and Hesitation of Engine
Irregular readings of the fuel pressure sensors create inconsistency in the timing of fuel injection. Consequently, there is misfiring of the engine when there is a break in the combustion process. As such, one could experience a pressure drop in the consistent movement.
Check Engine Light( CEL)
Newer computerized vehicle systems are sophisticated enough to detect any malfunctioning of sensors. Therefore, if the ECU records zero voltage readings of the fuel pressure sensor, it activates the Check Engine light. Often, scanning the vehicle would produce a certain Diagnostic Trouble Code (DTC) of the fuel pressure system.

Many people get confused between the fuel pressure regulator and fuel pressure sensor. While both are necessary for fuel flow, they work differently.
Symptoms of fuel pressure regulator failure often include excessive exhaust manifold emissions, which show that the fuel mixture is overly rich, and fuel odor, which is typically the result of a broken diaphragm in the fuel pressure regulator. If the sensor is replaced and the regulator has failed, fuel pressure will remain irregular.
If you have determined that the issue lies with the fuel rail pressure sensor, you must take the appropriate measures to conduct the repairs.
Finding the Sensor
To find the fuel rail pressure sensor, you should refer to your manual for the location. Typically, the fuel rail pressure sensor is attached to the fuel rail, which is a pipe that delivers fuel to the injector system. Always refer to the owner’s manual; the exact location may differ from brand to brand.
Steps for Replacement
It cannot be overstated how important it is to ensure that all equipment used in the repair of fuel systems must be of unrivaled quality. High-performance hardware must always be used when doing repairs on these systems. High-performance Tracktech Fasteners will ensure long-lasting durability when it comes to fuel rail and sensor mounting.
The fuel pressure sensor might be a tiny device, but its significance cannot be ignored. By keeping track of the symptoms of failure – like engine hesitation, poor fuel efficiency, and unexpected engine stalling – one can save themselves from expensive repairs later.
If you suspect that you might have a faulty sensor, be sure to get a professional diagnostic scan done and check your fuel rail pressure sensor diagram for proper repairs. When looking to run your engine efficiently, you can rely on the innovative solutions offered by Tracktech Fasteners.

 Customer